High Level Objectives:
-
Preparing Environment
-
Creating Databricks Cluster
-
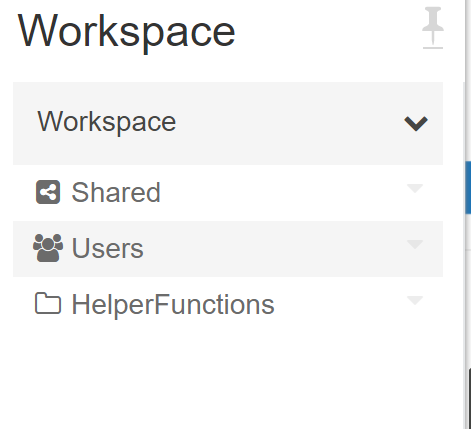
Importing Notebooks
-
Databricks Extensibility
-
Uploading Manual Data
-
Let’s dig into the notebook.
Good additional resources:
https://spark.apache.org/docs/latest/
1. Preparing Environment – Securing Sensitive Information
Why Bother?
For a given workspace, when an Azure key-Vault Secret Scope is created, it links Azure Key Vault, a secure place to store password sensitive information, and then makes it available to a workspace. So, really, we need to have 1 key-vault per workspace, put the secrets there, and then leverage them. But…
-
Suppose you have a notebook and would like to use a 3rd Party API Key – example FaceBook Analytics, then you would need a place to store sensitive information. During this hack – you have been granted access to go into the Azure Key Vault Resource, and See the Secrets. Perhaps your team will need to store secrets, that might be a good scenario for knowing how to Add a Secret Scope to a workspace.
-
Suppose that have very sensitive information. Currently the mounts in a workspace are created by a service principal. That means they are available for the entire workspace. You may find that based on your use cases, additional Azure Databricks workspaces are needed, in which case, this also makes sense to know how to do. Super easy, and secures your information.
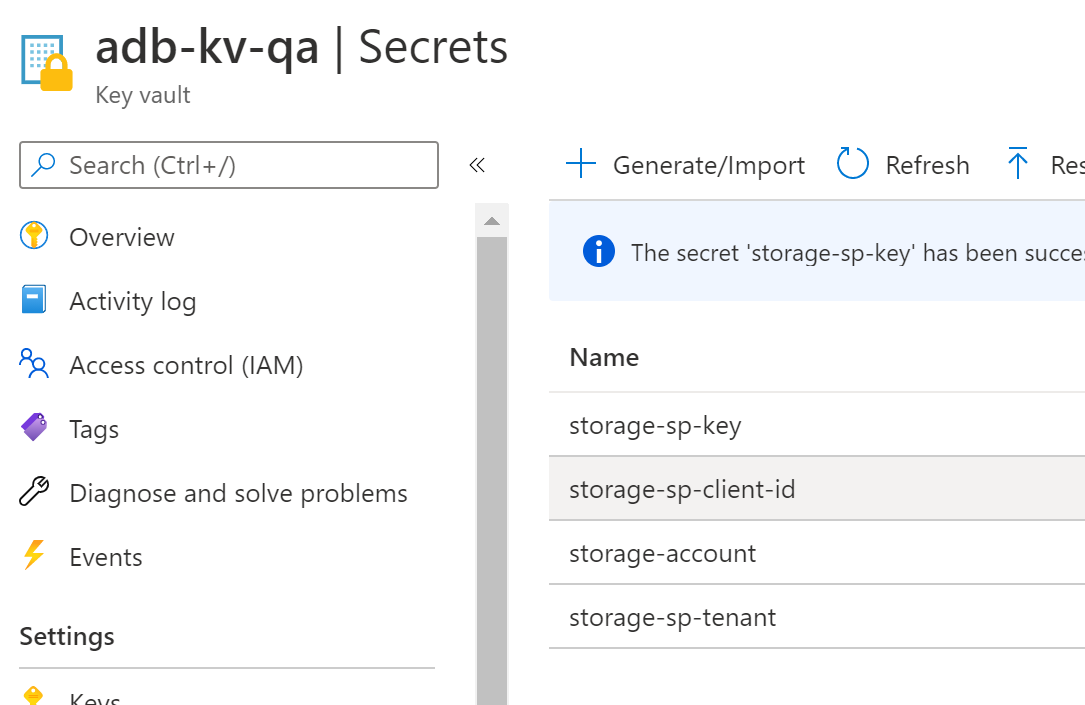
Create an Azure Key-Vault Secret Scope using the UI.
Once your Azure Databricks workspace is open in a separate window, append #secrets/createScope to the URL. The URL should have the following format: https://<\location>.azuredatabricks.net/?o=<\orgID>#secrets/createScope
Enter a scope name, and enter the Azure Key Vault DNS name and Resource ID you saved earlier. Save the scope name in a text editor for use later in this tutorial. Then, select Create.
Creating the Secret Scope As an FYI - we could do this using:
- Databricks ClI
- Databricks APIs
- Through the Portal
Often this will be part of a an IAC deployment, but consider the use case of 3rd party API keys.
Steps to Create a Secret Scope:
- Go to the url for your databaricks environment and add #secrets/createScope

-
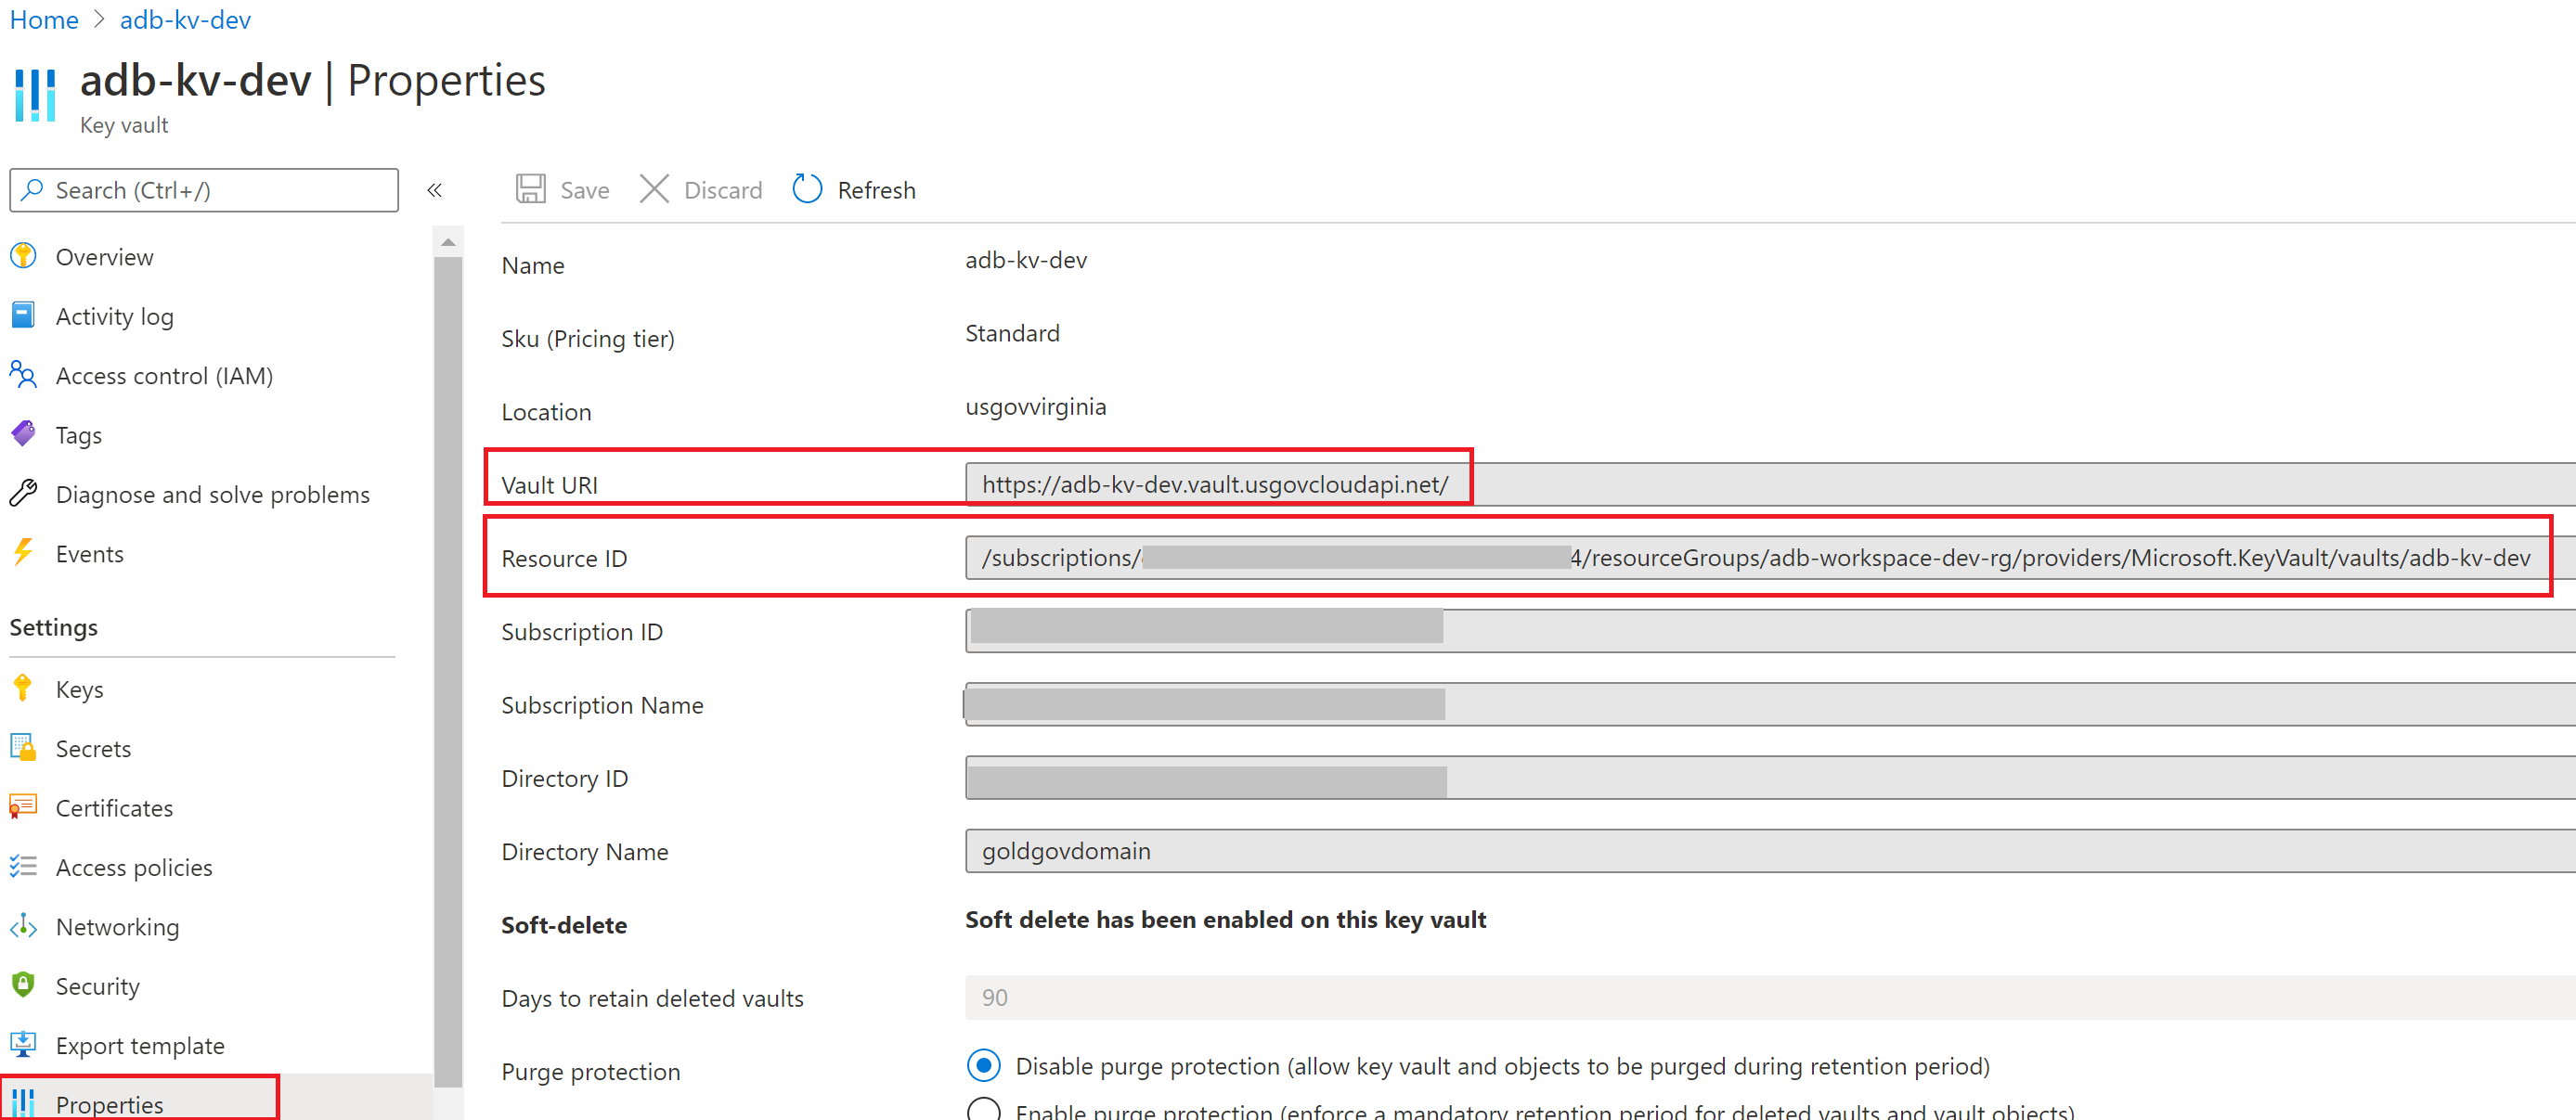
Head over to the Azure portal to view our resources.
Portal.azure.com - open the key vault and head to properties and grab the Vault URI and the Resource ID to place into our secret scope
-
Note for the name, it needs to be unique. A recommendation would be to user your initials to make it unique to yourself.
-
Here we can provide into the databricks secret scope the Vault URI into the DNS name, as well as the Resource ID into the ResourceID. For Manage Principal -
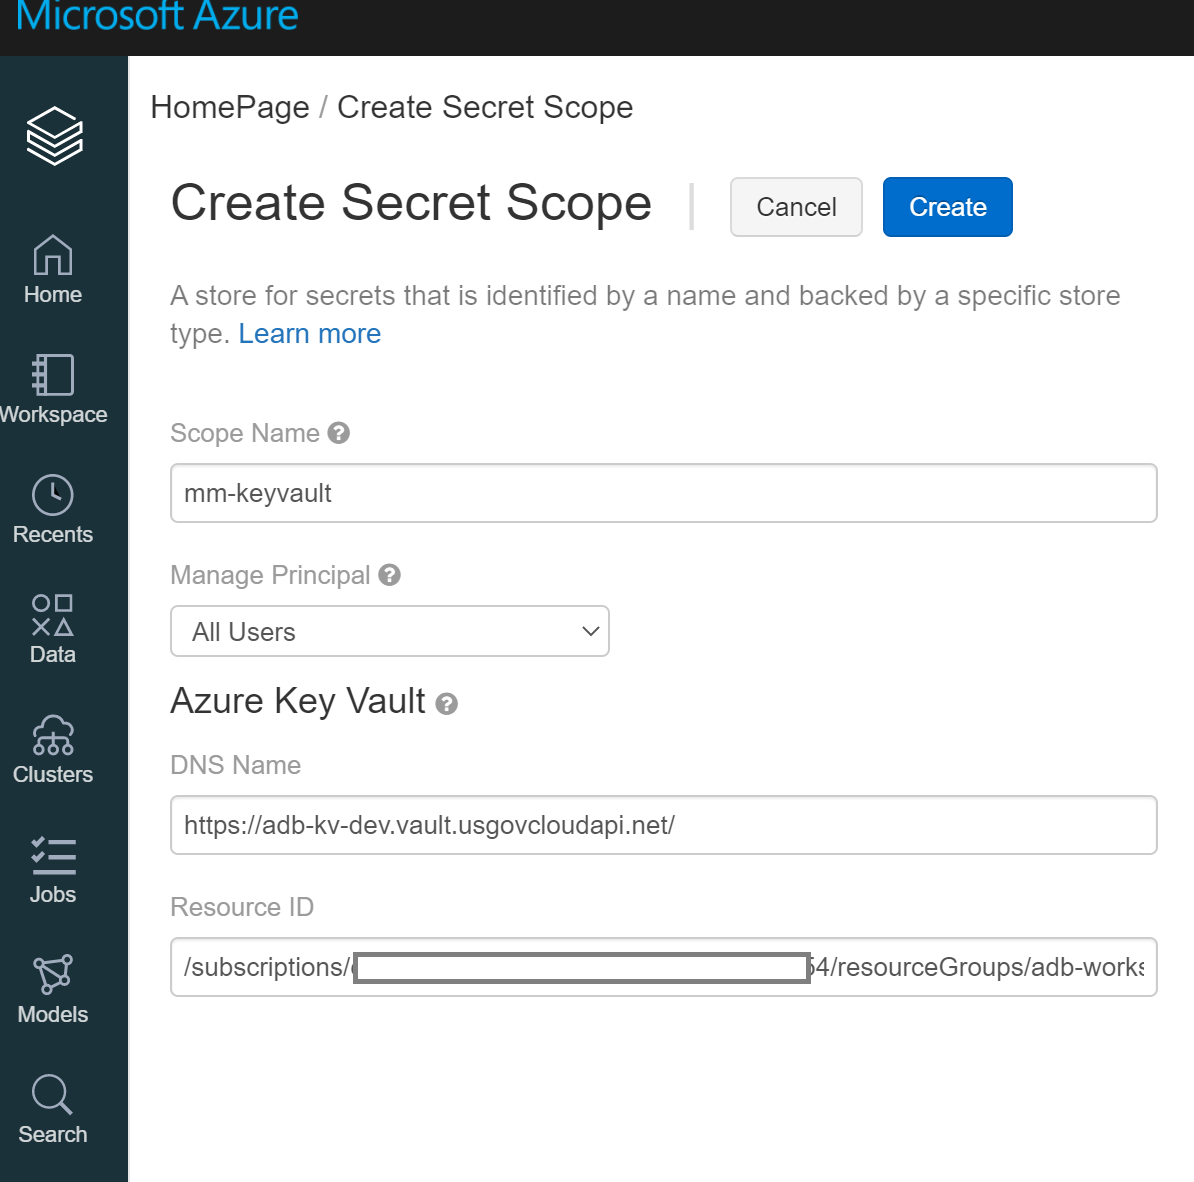
Keep the name of your secret scope handy
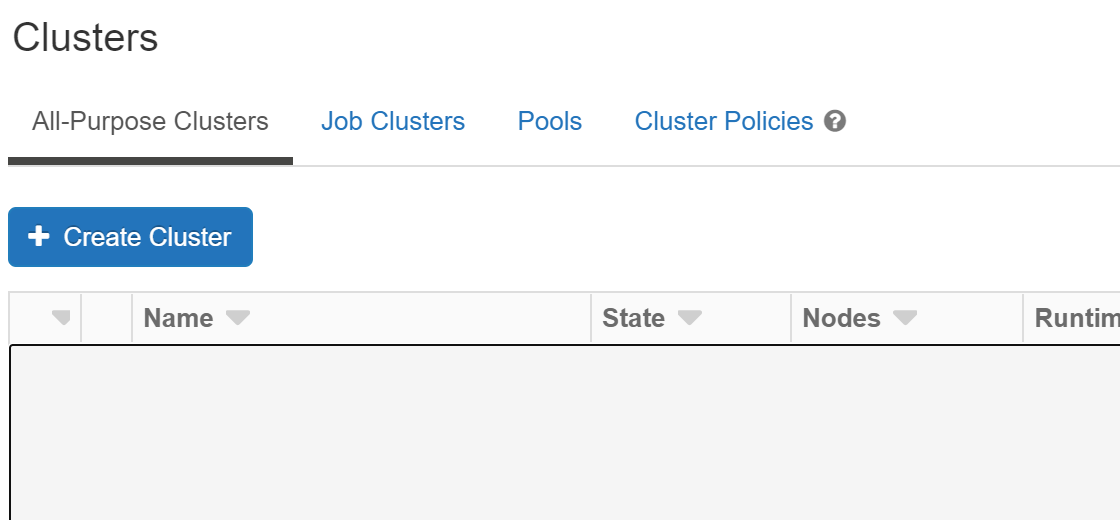
2. Create a Databricks Cluster
Let’s create a databricks cluster by clicking on the cluster tab.
Let’s leverage the 7.3 Runtime
https://docs.databricks.com/release-notes/runtime/7.3ml.html
Then click on the Create Cluster button
Provide a cluster name – each cluster must have a unique name.
Typically if I am working in a shared envirment, I will use my initials if that works for the team.
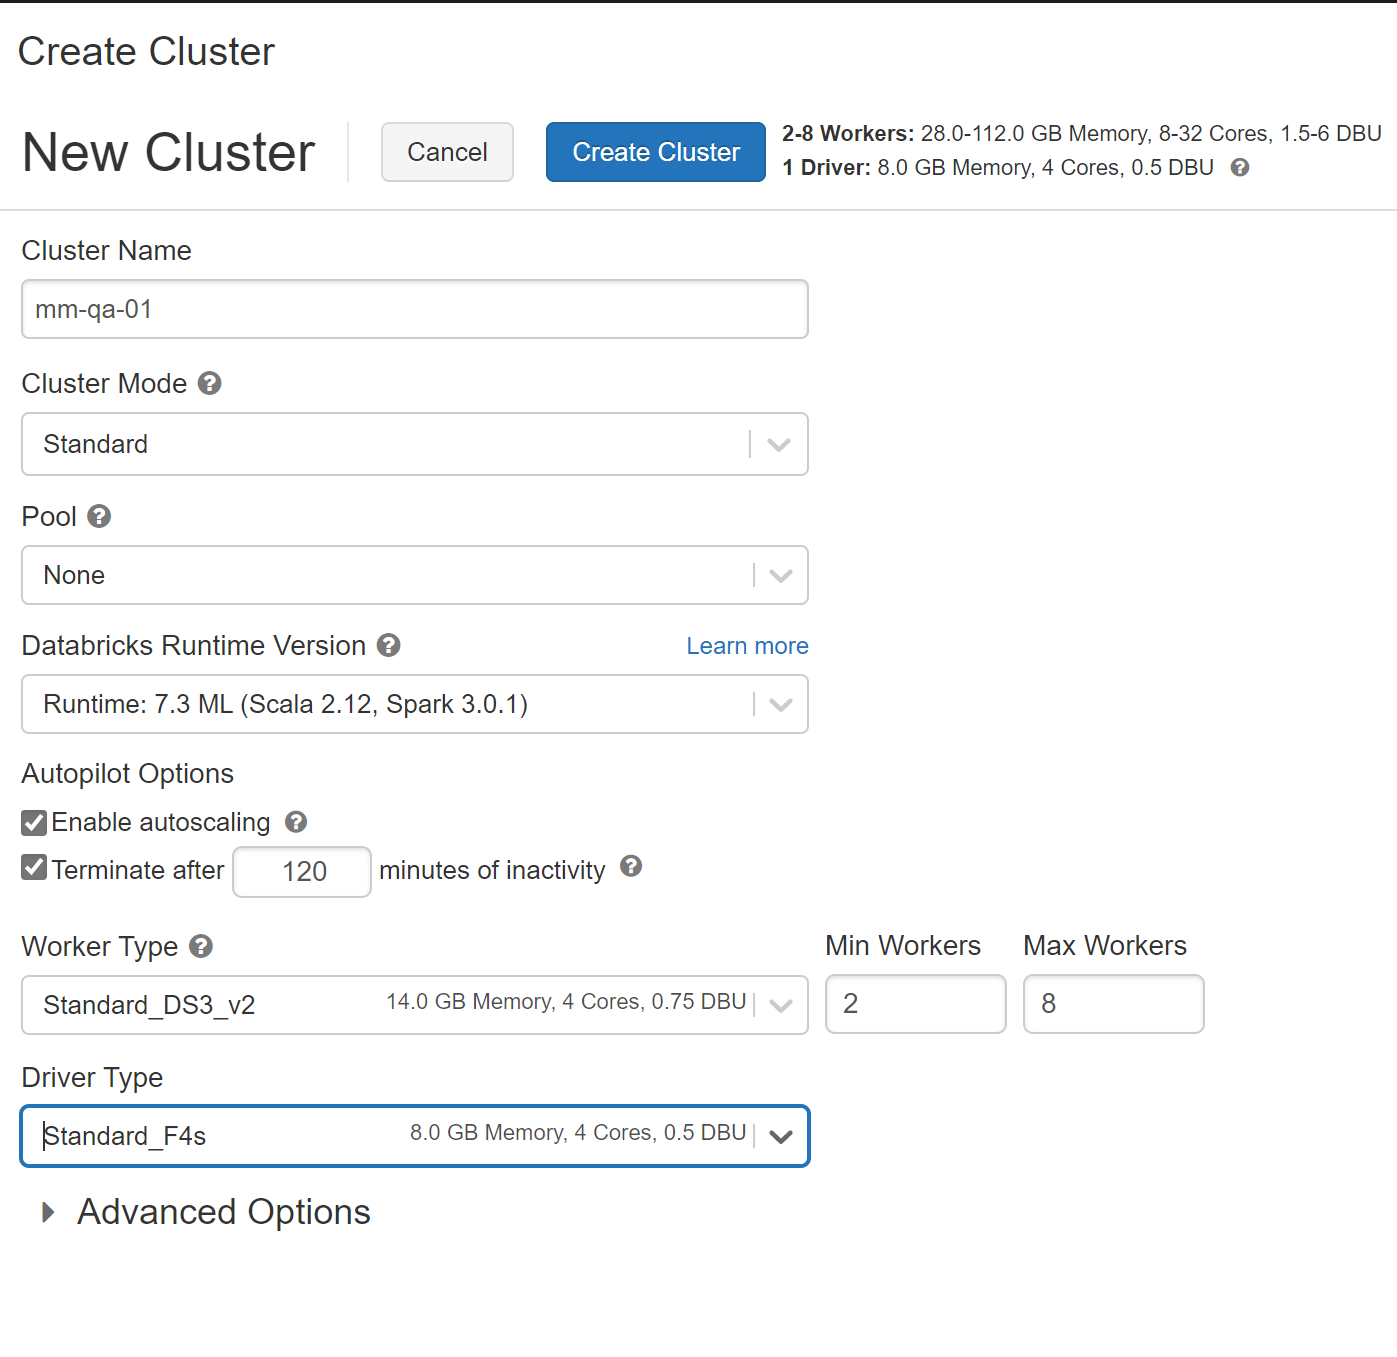

Select a Cluster Mode of Standard
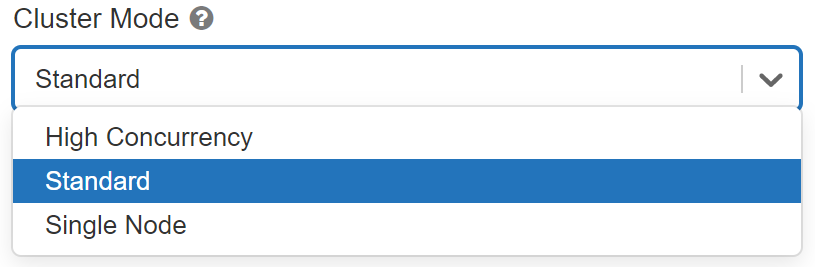
| Cluster Mode | Cluster Mode Description |
|---|---|
| Standard | A standard cluster is meant to be used by 1 user |
| High Concurrency | Shared for multiple users |
| Single Node | A Single Node cluster is a cluster consisting of a Spark driver and no Spark workers (in public preview) |
We can go ahead and specify work nodes 1-3

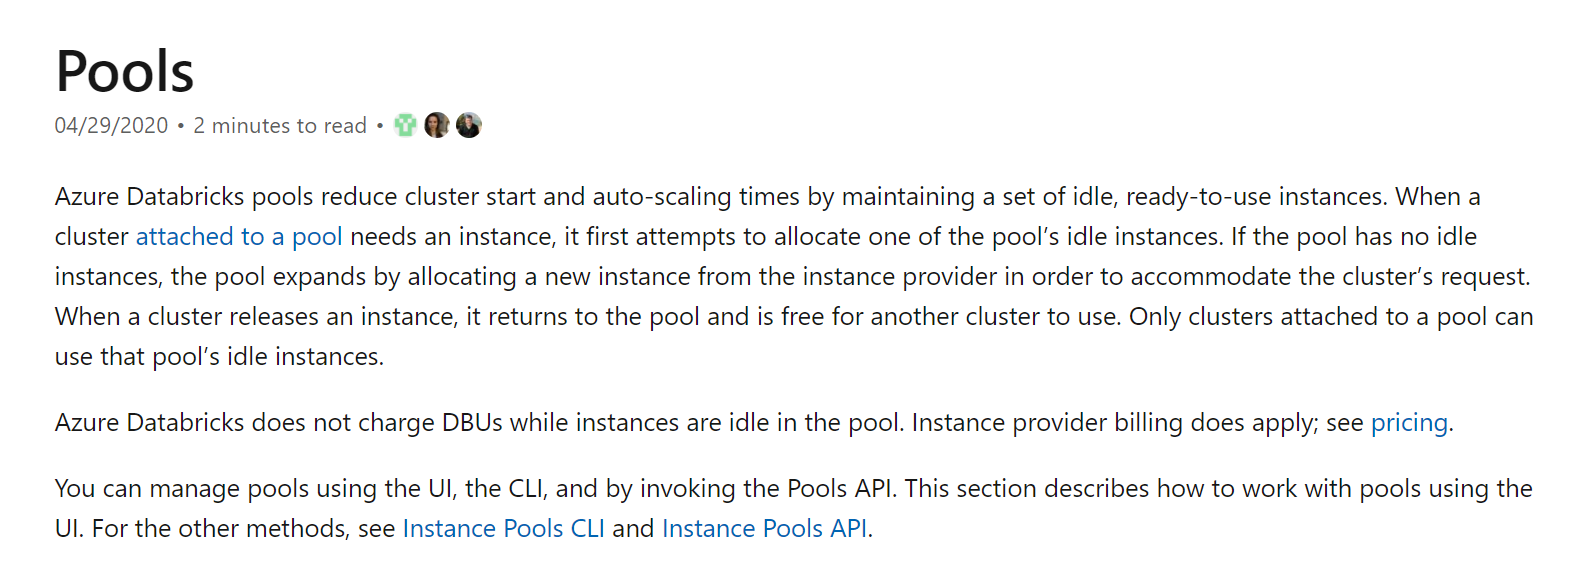
Whats a pool ? Pools
Speeds up cluster creation using existing available Azure vms
https://docs.microsoft.com/en-us/azure/databricks/clusters/instance-pools/
| Options | Description |
|---|---|
| Enable Auto-scalling | Good if uncertain how many clusters you wil need, or great varability in your job |
| Auto shutdown | Makes sense to use |
| Worker Type | Select based on the work load. |
| Drive Type | Select based on the work load, if bringing a lot of data back to the head node, then give the driver more resources |
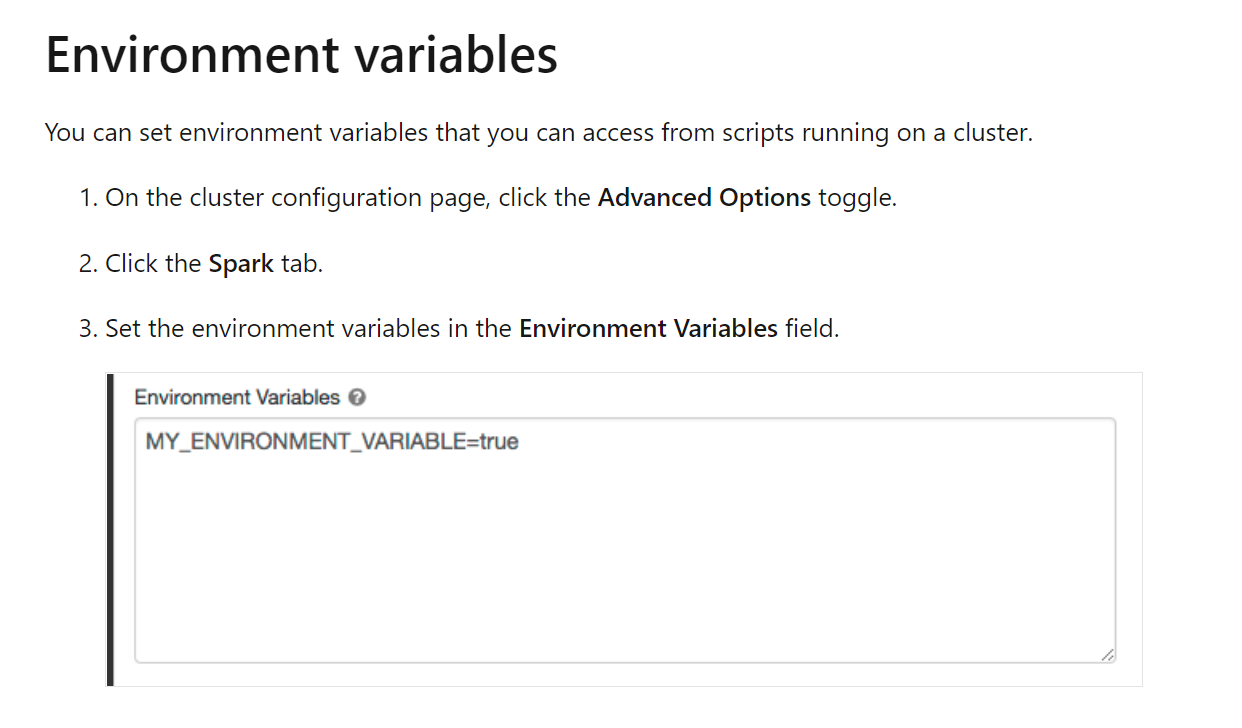
FYI - Advanced Options
https://docs.microsoft.com/en-us/azure/databricks/clusters/configure#spark-config
Setting Environment Variables
3. Importing Notebooks
When you export a notebook as HTML, IPython notebook, or archive (DBC), and you have not cleared the results, the results of running the notebook are included.
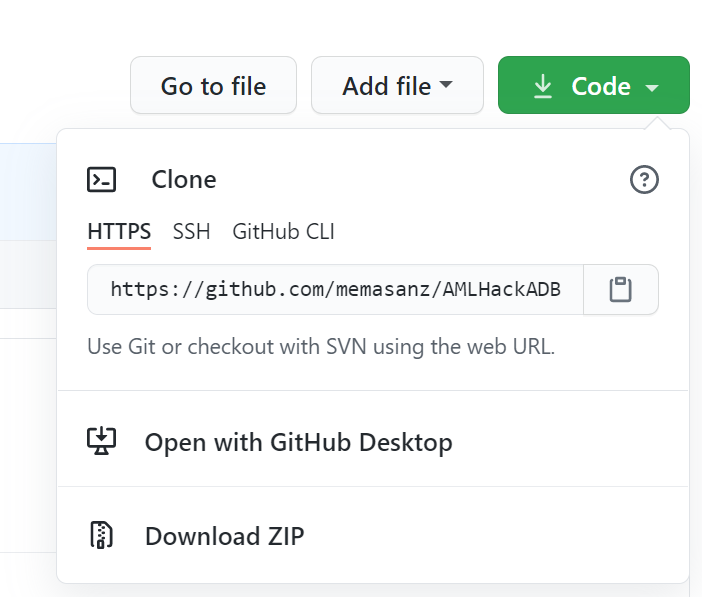
These notebooks are located in a git repo.
Leverage git to clone down this repo:
https://github.com/memasanz/AMLHackADBMLFlow.git
Or Download the Zip File.
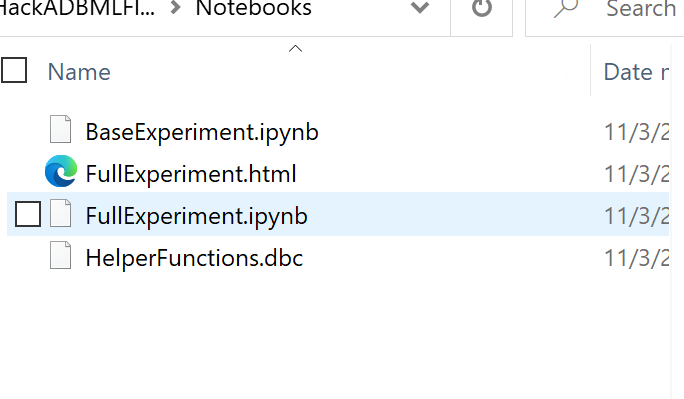
We will have 1 person import the HelperFuncions notebook. This notebook is intented to how leveraging one notebook inside another. We will spend a little time customizing this notebook to demonstrate leveraging a python class inside the databricks notebook expereince.
Everyone will import the FullExpermient, BaseExperiment and BaseExperimentWithAzureMLIntegration notebooks under this user.
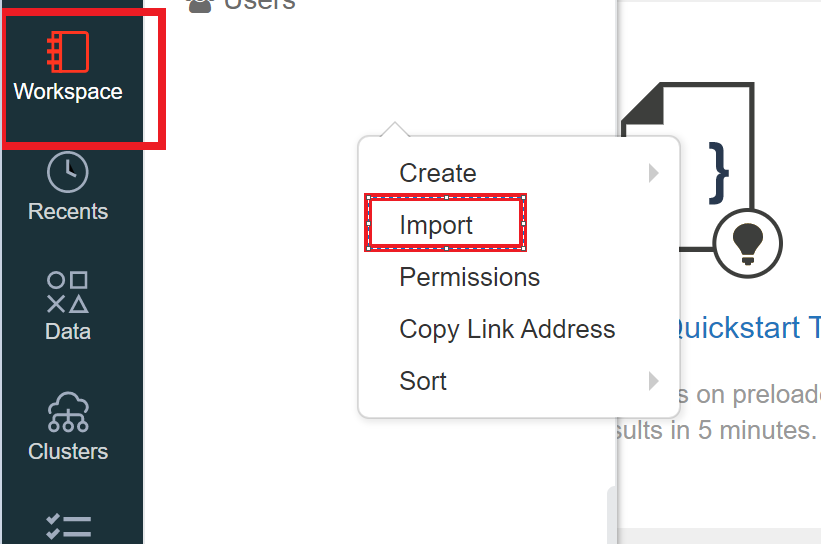
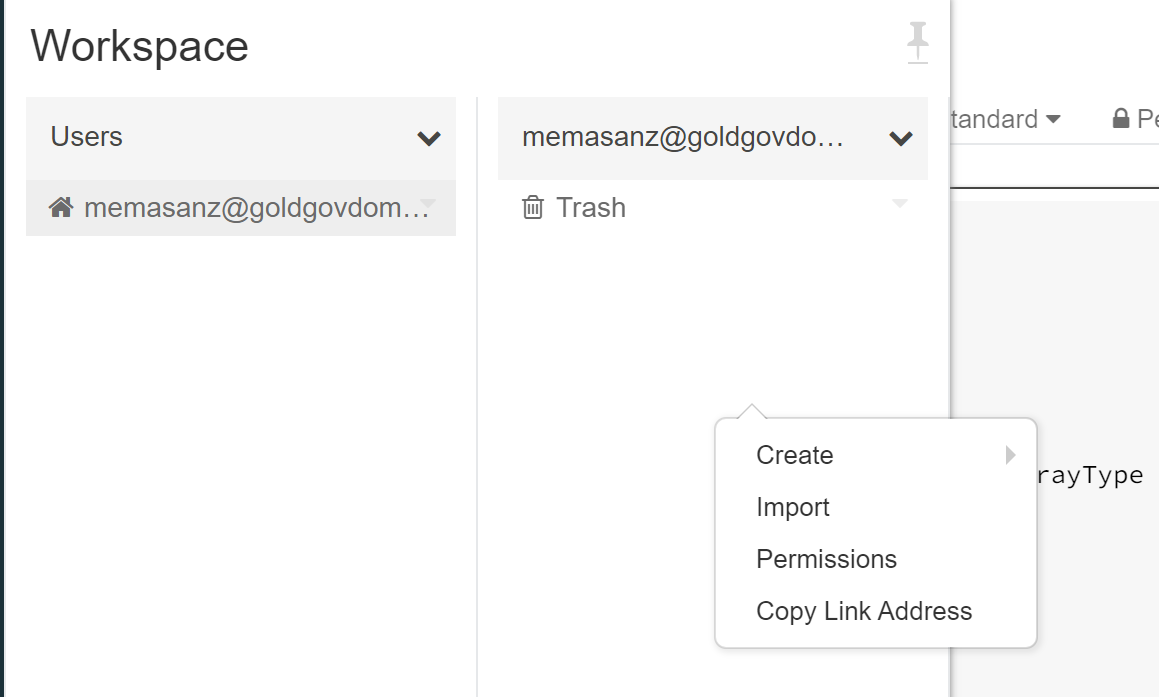
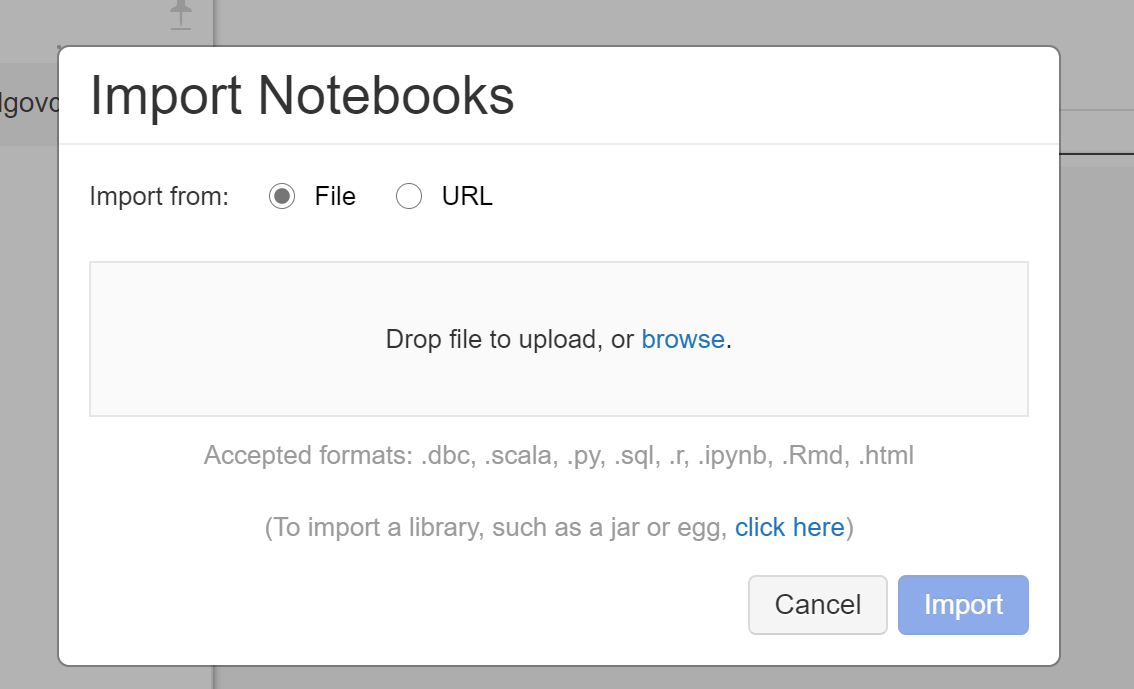
Note that we will have to manually load notebooks 1 at a time if they are *.pynb extension
Import the following:
- FullExperiment.ipynb
- BaseExperiment.ipynb
The files: BaseExperiment.ipynb is really just for reference, so you can move them into a folder to keep your workspace clean if you would like.
Go ahead and create a folder - samples and place them in there.
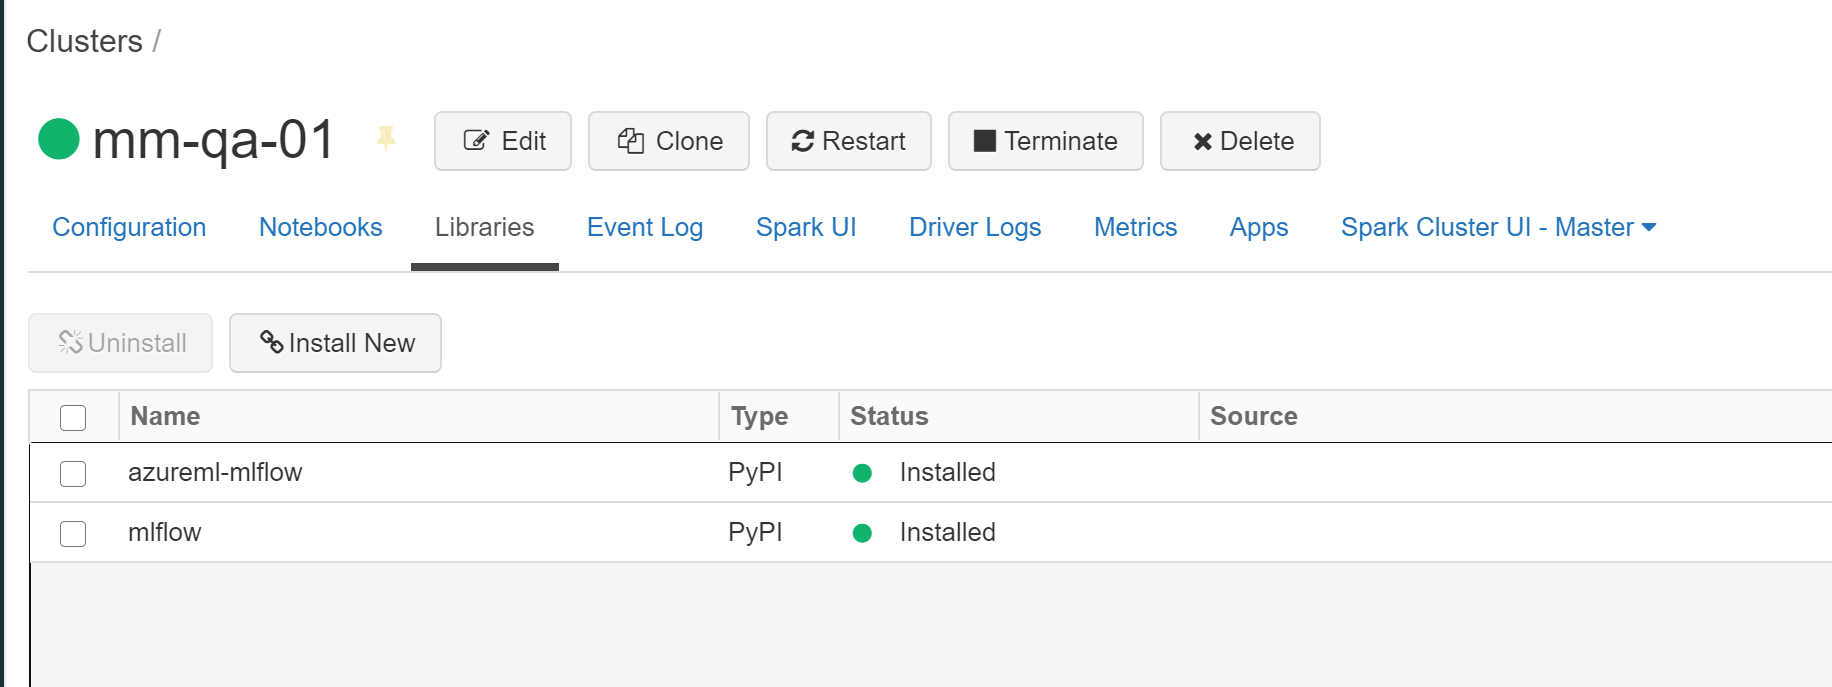
4. Install Libraries:
On the cluster tab, click on your cluster and slect install new.
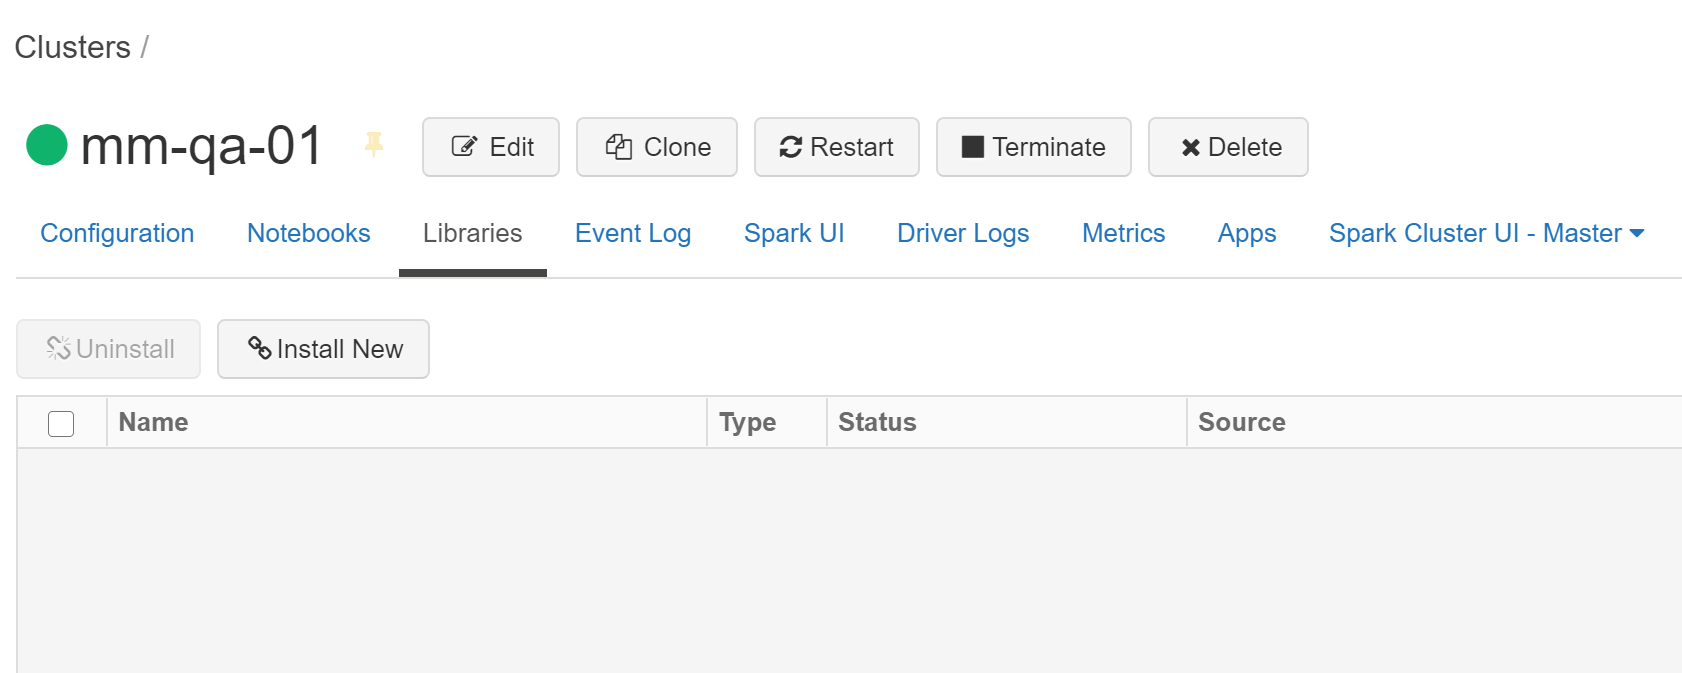
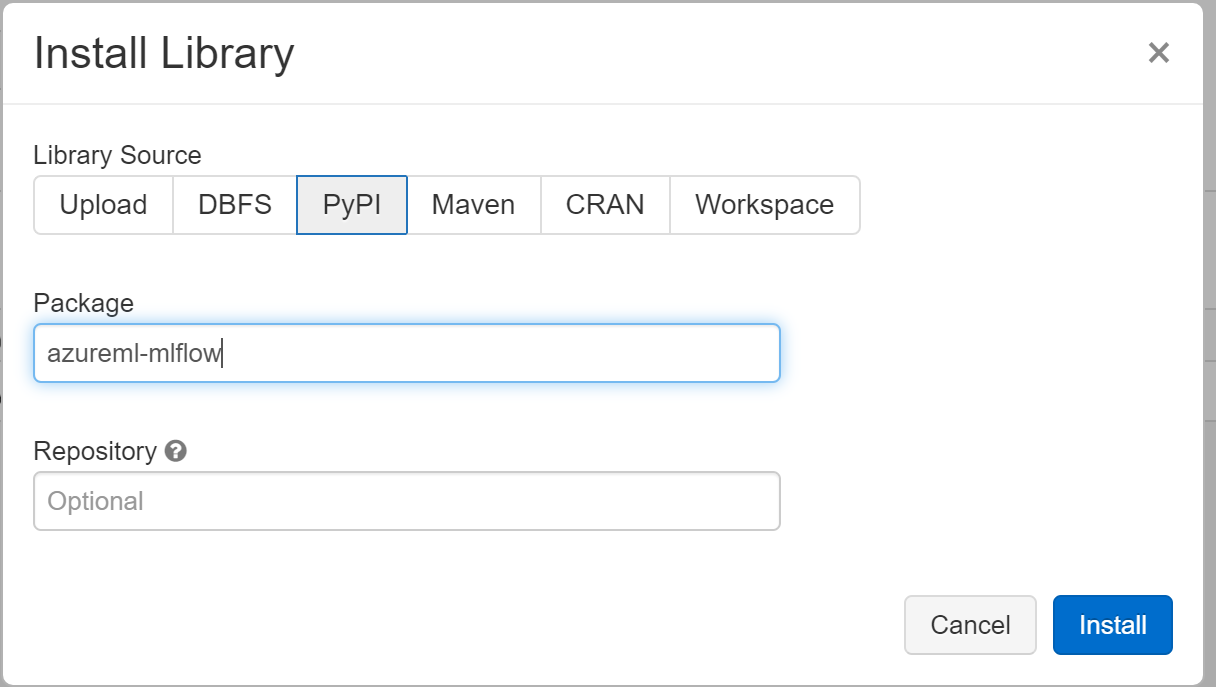
Install ML Flow
| PyPI Packages to install | Comment |
|---|---|
| azureml-mlflow | |
| mlflow | Actually already installed, but doesn’t hurt to install |
5. Databricks Extensibility (Optional Content):
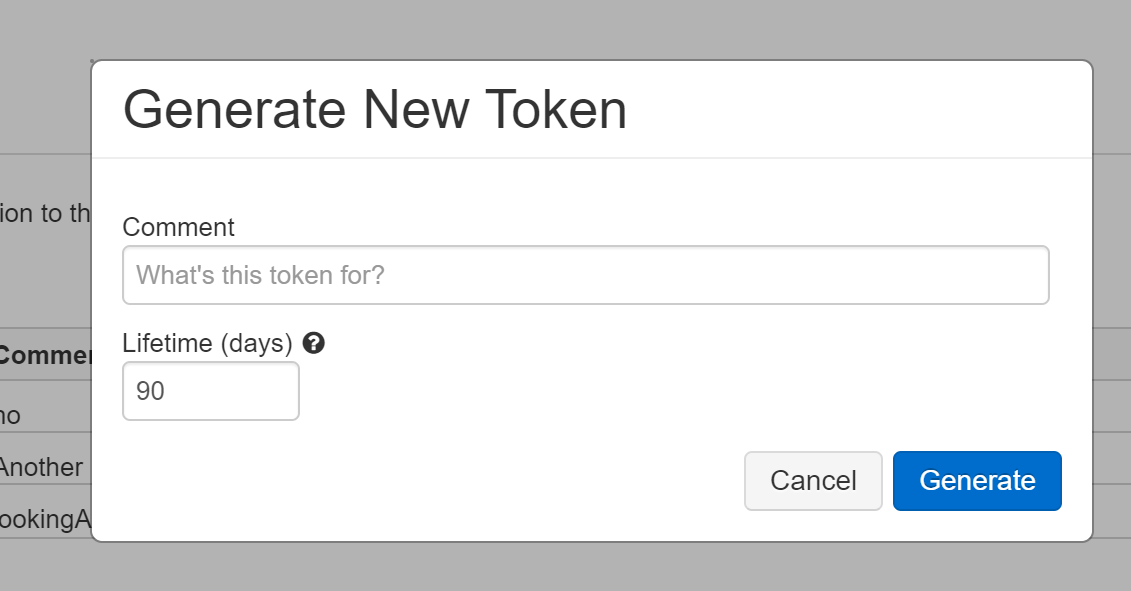
Databricks Rest APIS https://docs.databricks.com/dev-tools/api/index.html
In order to make an API Call, we need to generate a token. You could supply user/password informaiton, but it is safer and cleaner to provide token. To generate a token head over to the left

Click on the generate new token button
Sample Curl to get list of clusters (Optional Content):
curl -X GET -H 'Authorization: Bearer dapi0XXXXXXXXXX' https://adb-1797455930767468.0.databricks.azure.us//api/2.0/clusters/list
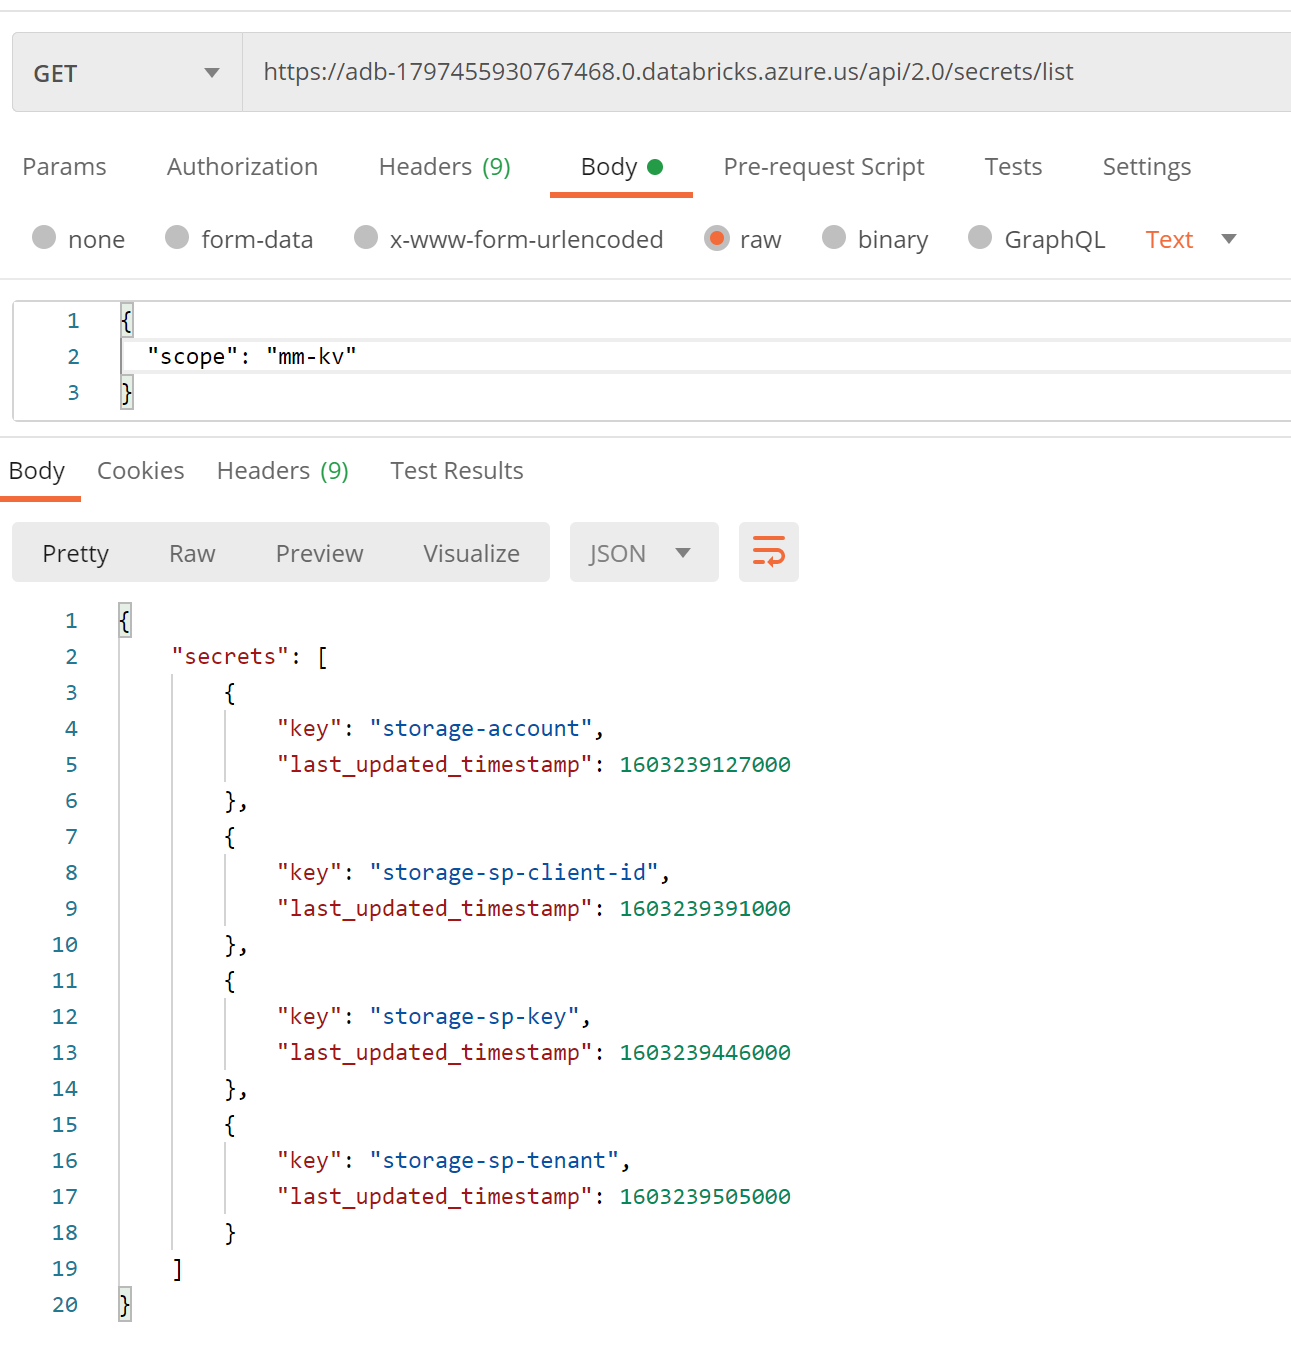
We can also examine the list of secrets in a secret scope.
Just don’t forget to provide the token

6. Let’s dig into the notebook
In the notebook we will cover:
- Leveraging an external notebook with our secret scopes (updating a class to reflect what currently is marked as secret scopes)
The existing class works with the following parameters in key-Vault, we can update the class to leverage what you currently have in key vault.
- Importing data into databricks (wine dataset)
- Reading csv into Spark Dataframe & Pandas Dataframe
- Adding columns to Spark Dataframe
- Adding columns to Pandas Dataframe
- Creating Tables
- Creating plots for analysis
- Create Model
Afer running the experiement, we have established a model. Check out the experiements icon.
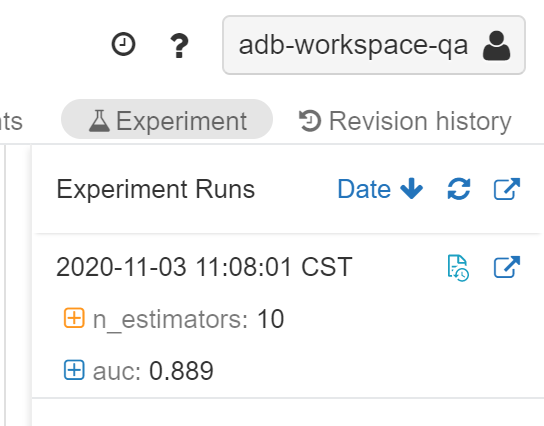
We can also view the experiment in full.
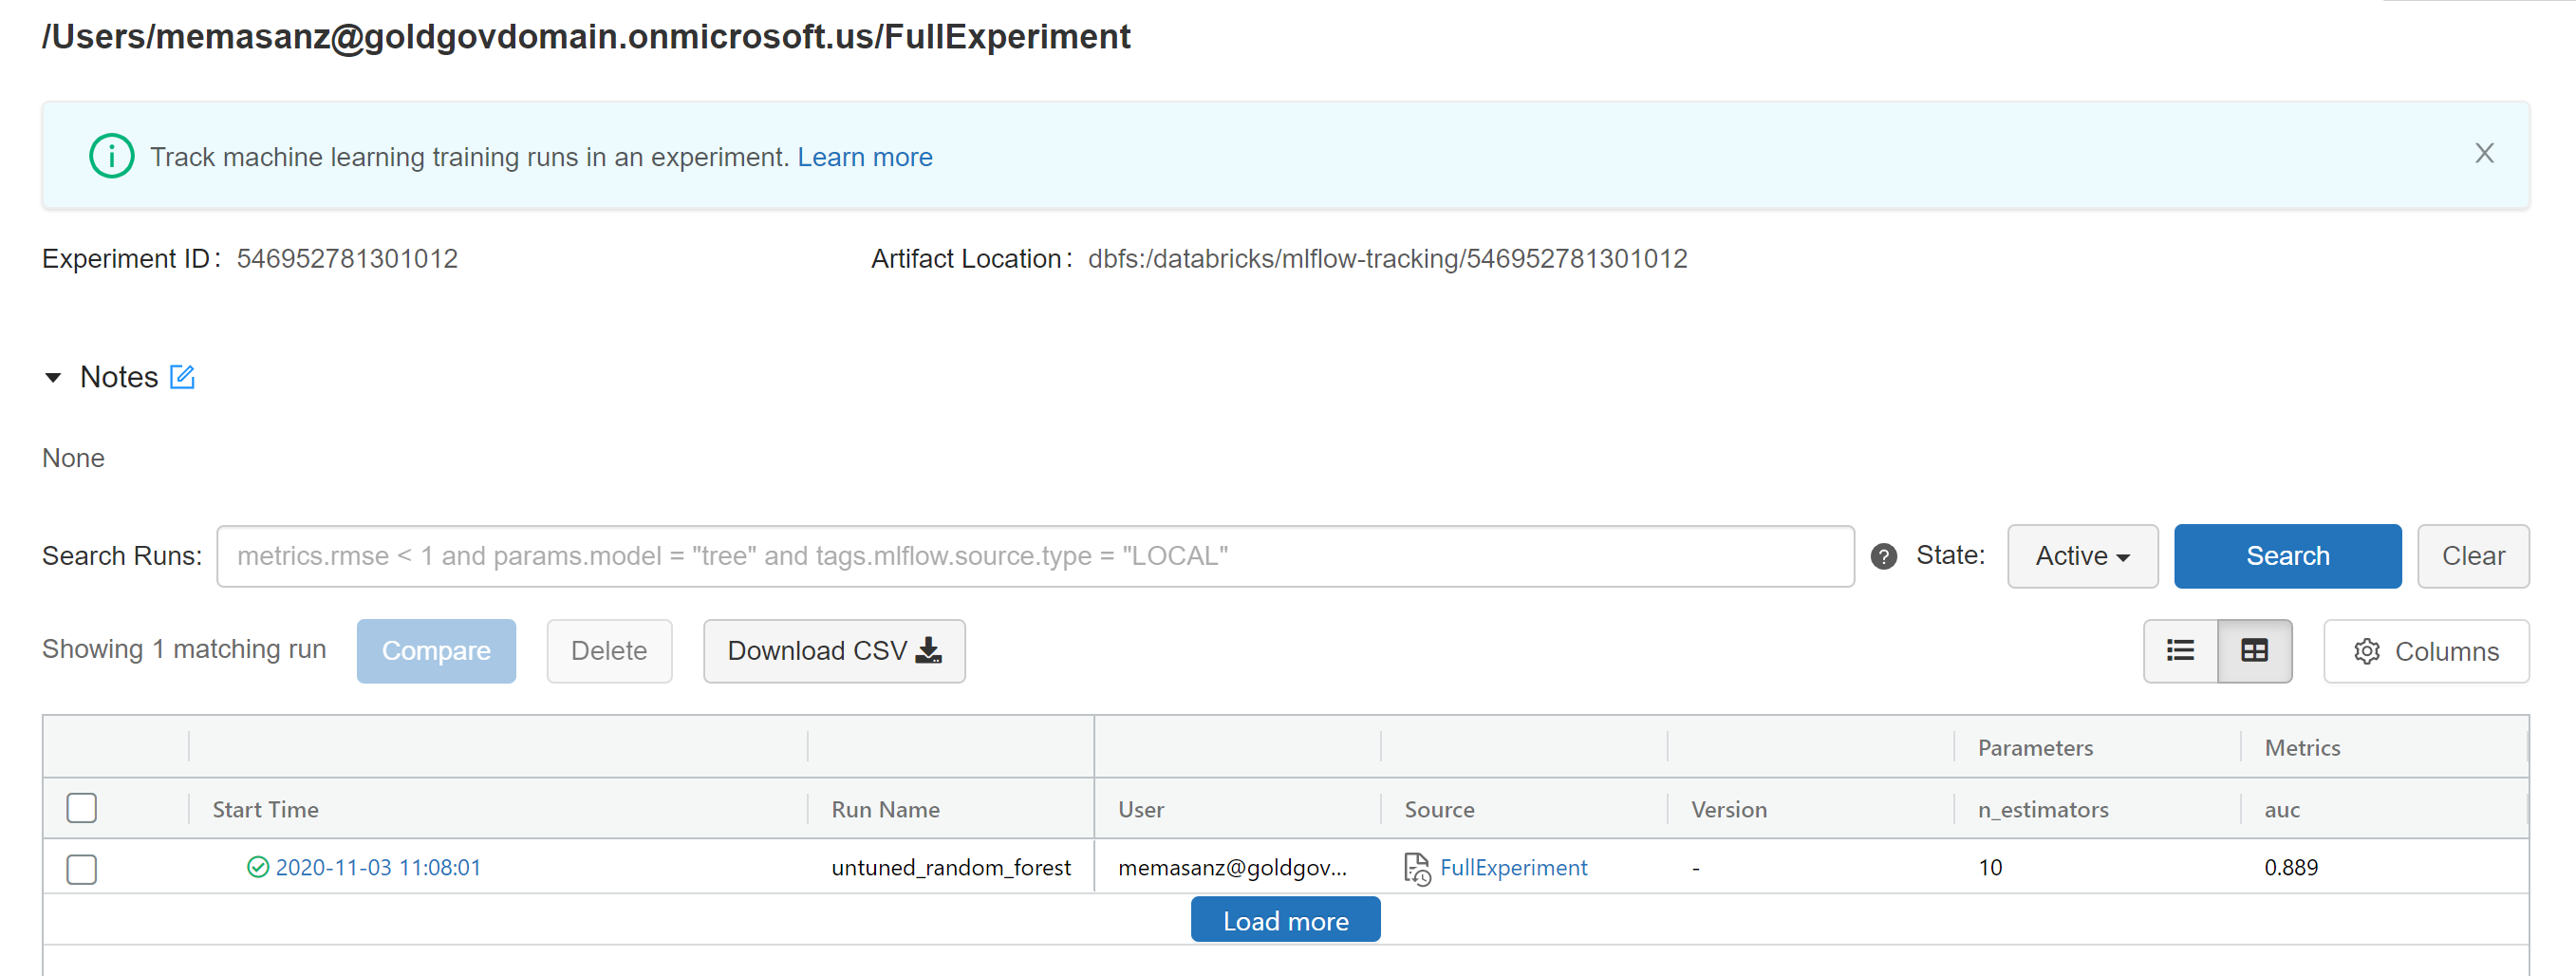
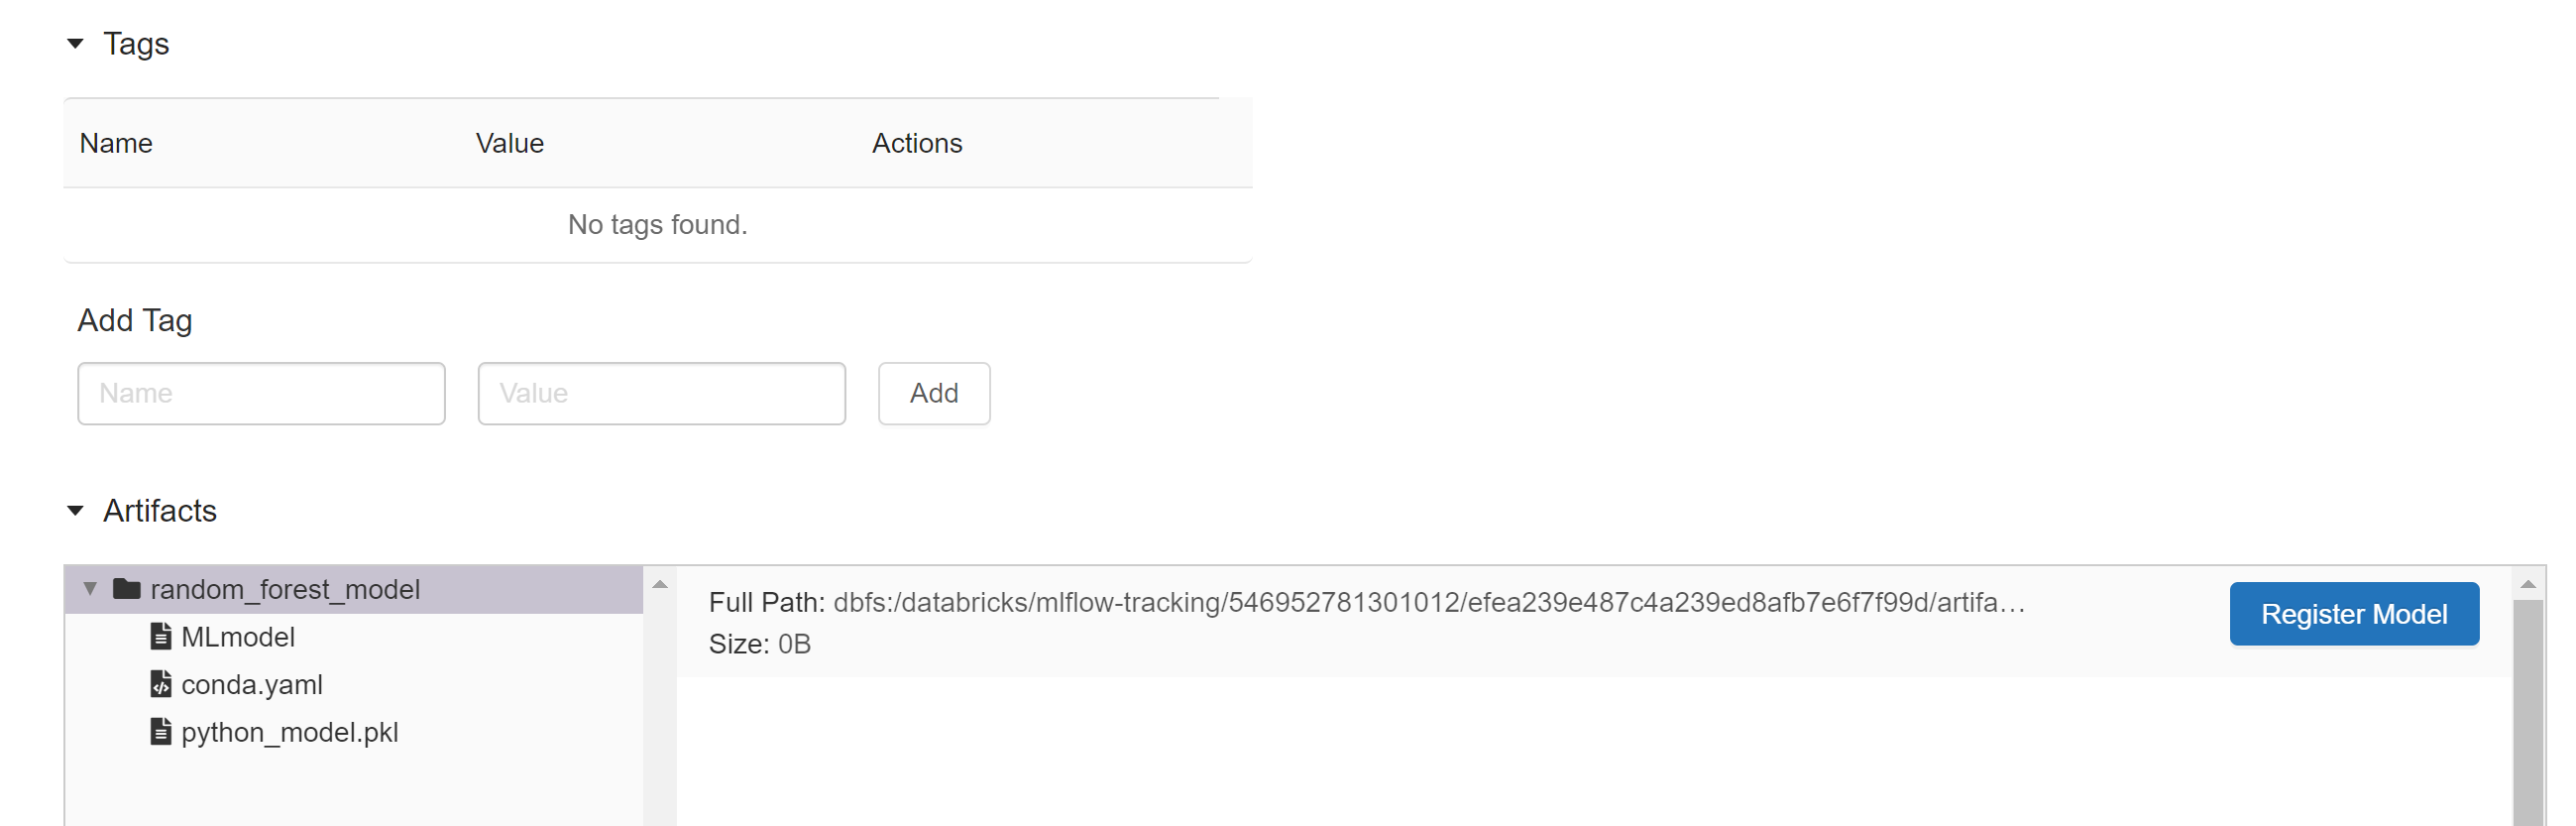
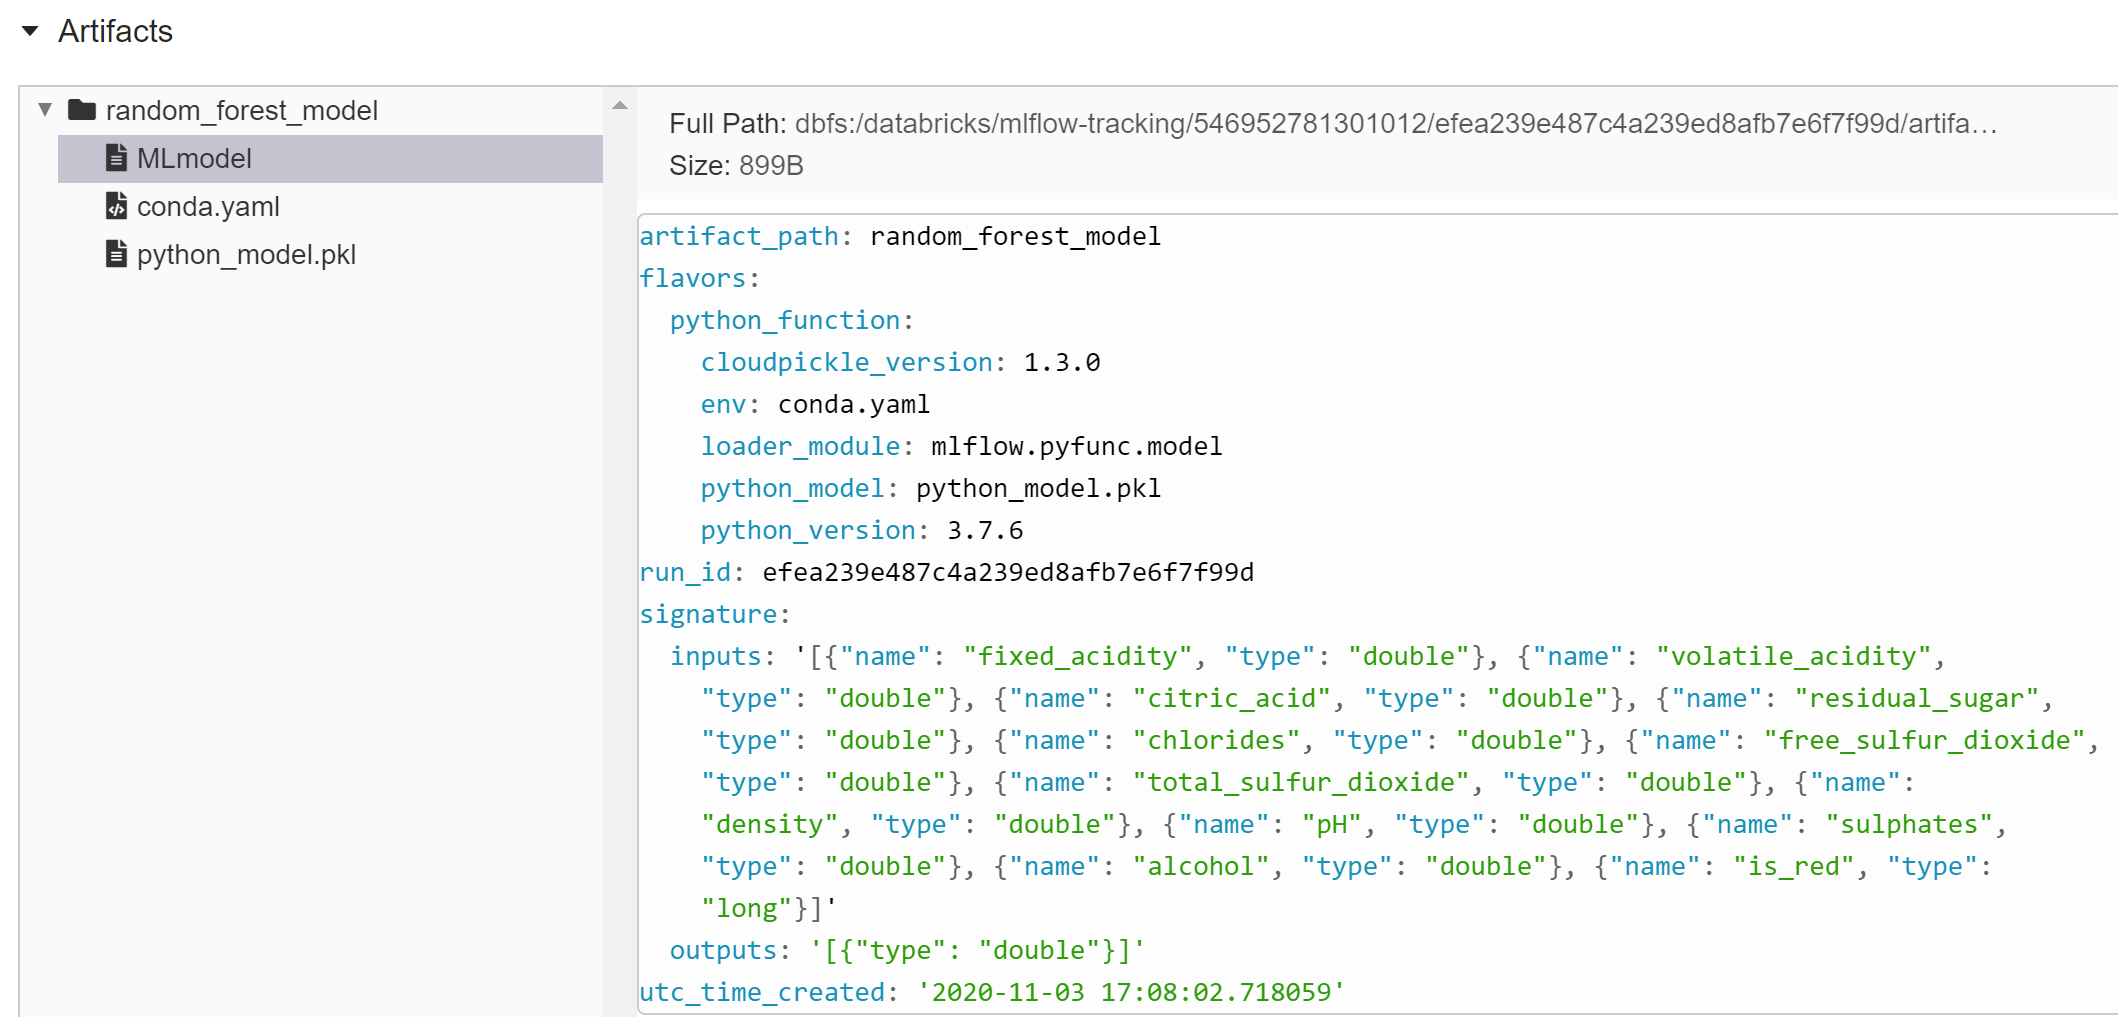
You can scroll down and view the artifacts captured for the model.
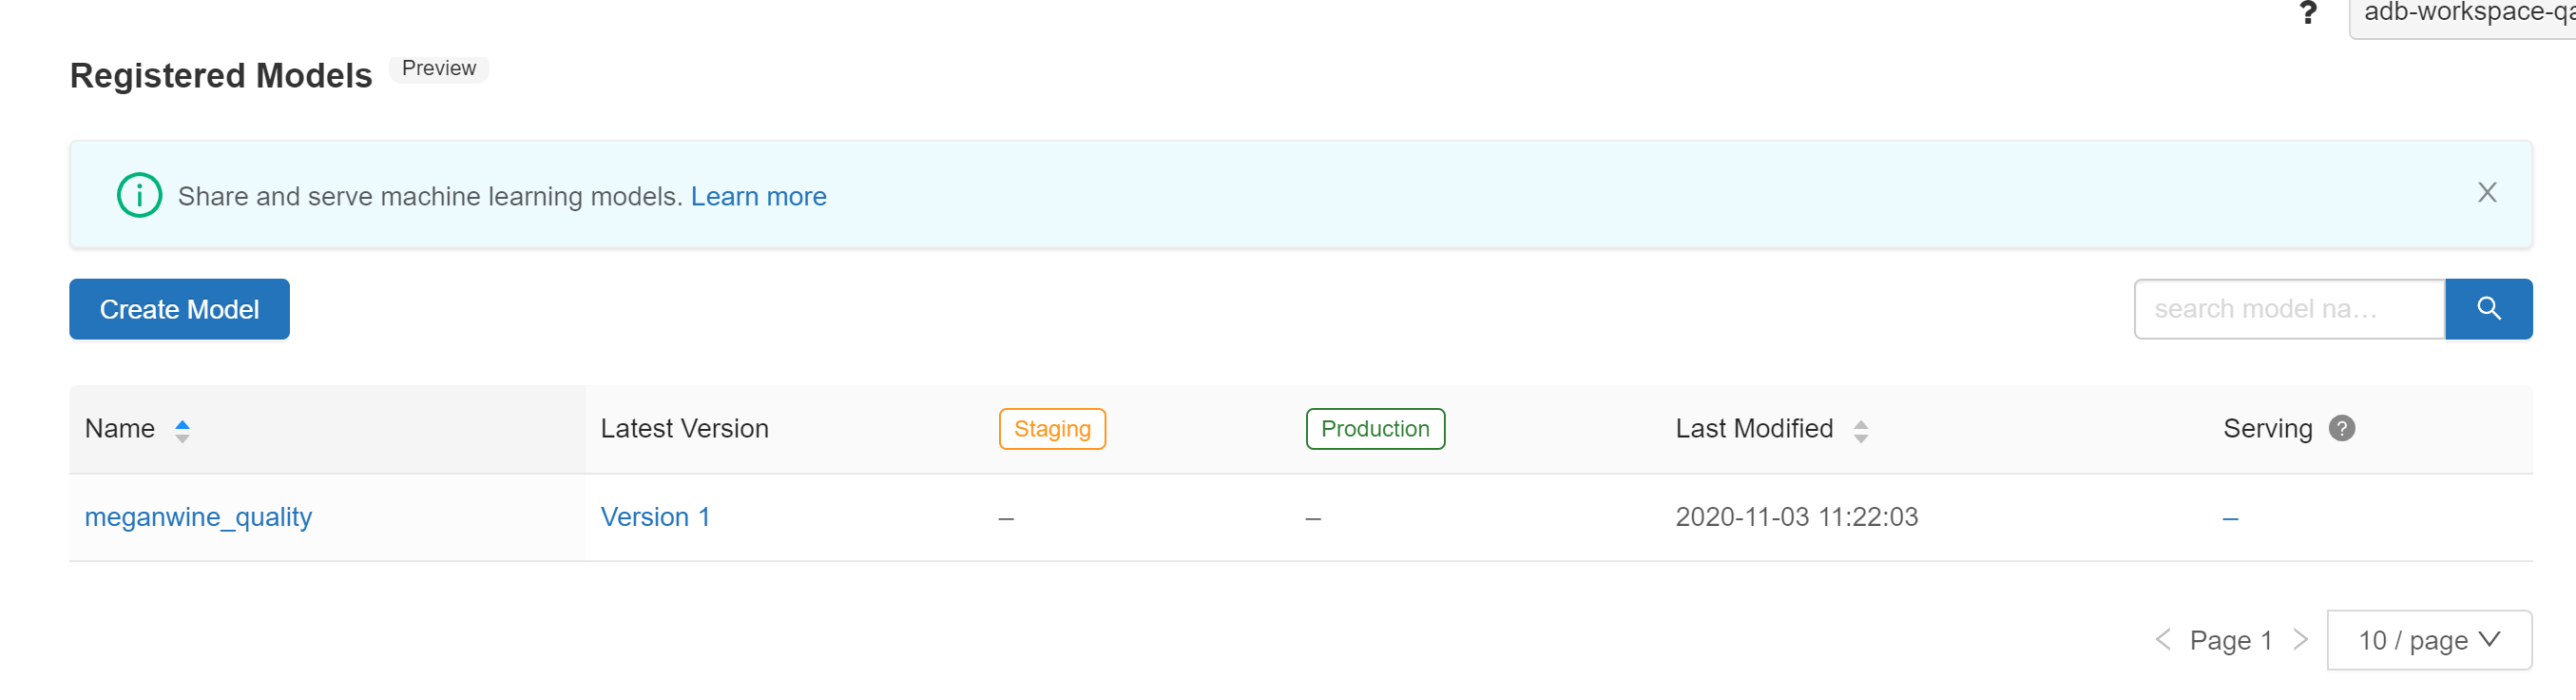
- Registering a model
- Improve Model
- Archiving Model and moving previous model to archive
- Registering Model in Azure ML and Deploying to AKS Cluster
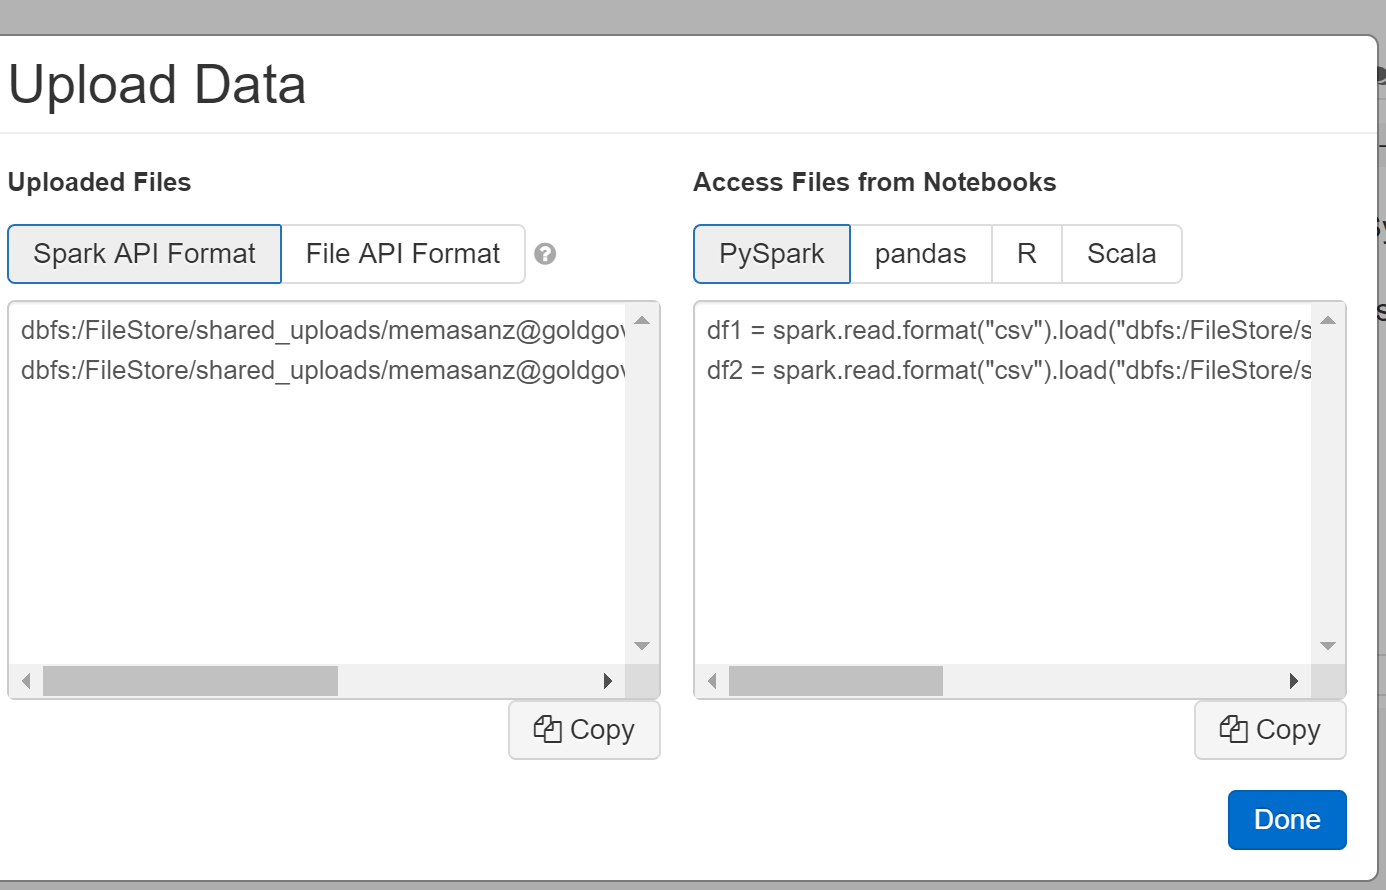
7. Uploading Data Manually (covered in notebook)
Uploading Datasets:
When you select File-> Upload Data, select on hyper link.
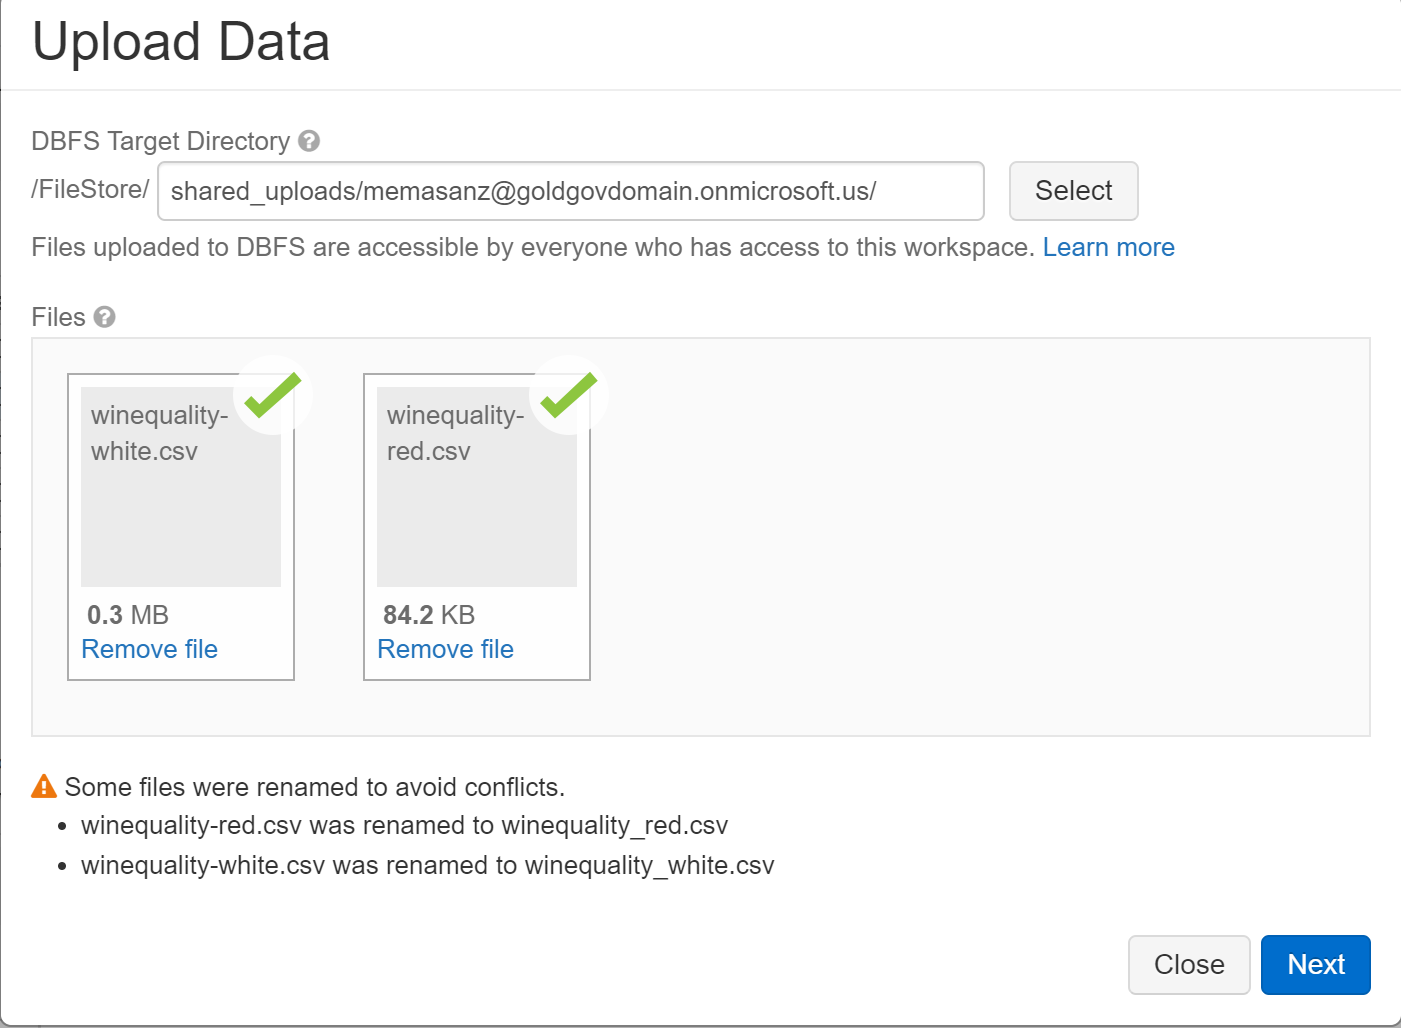
Note they will give you some default pySpark code based on the fact is is a csv file.